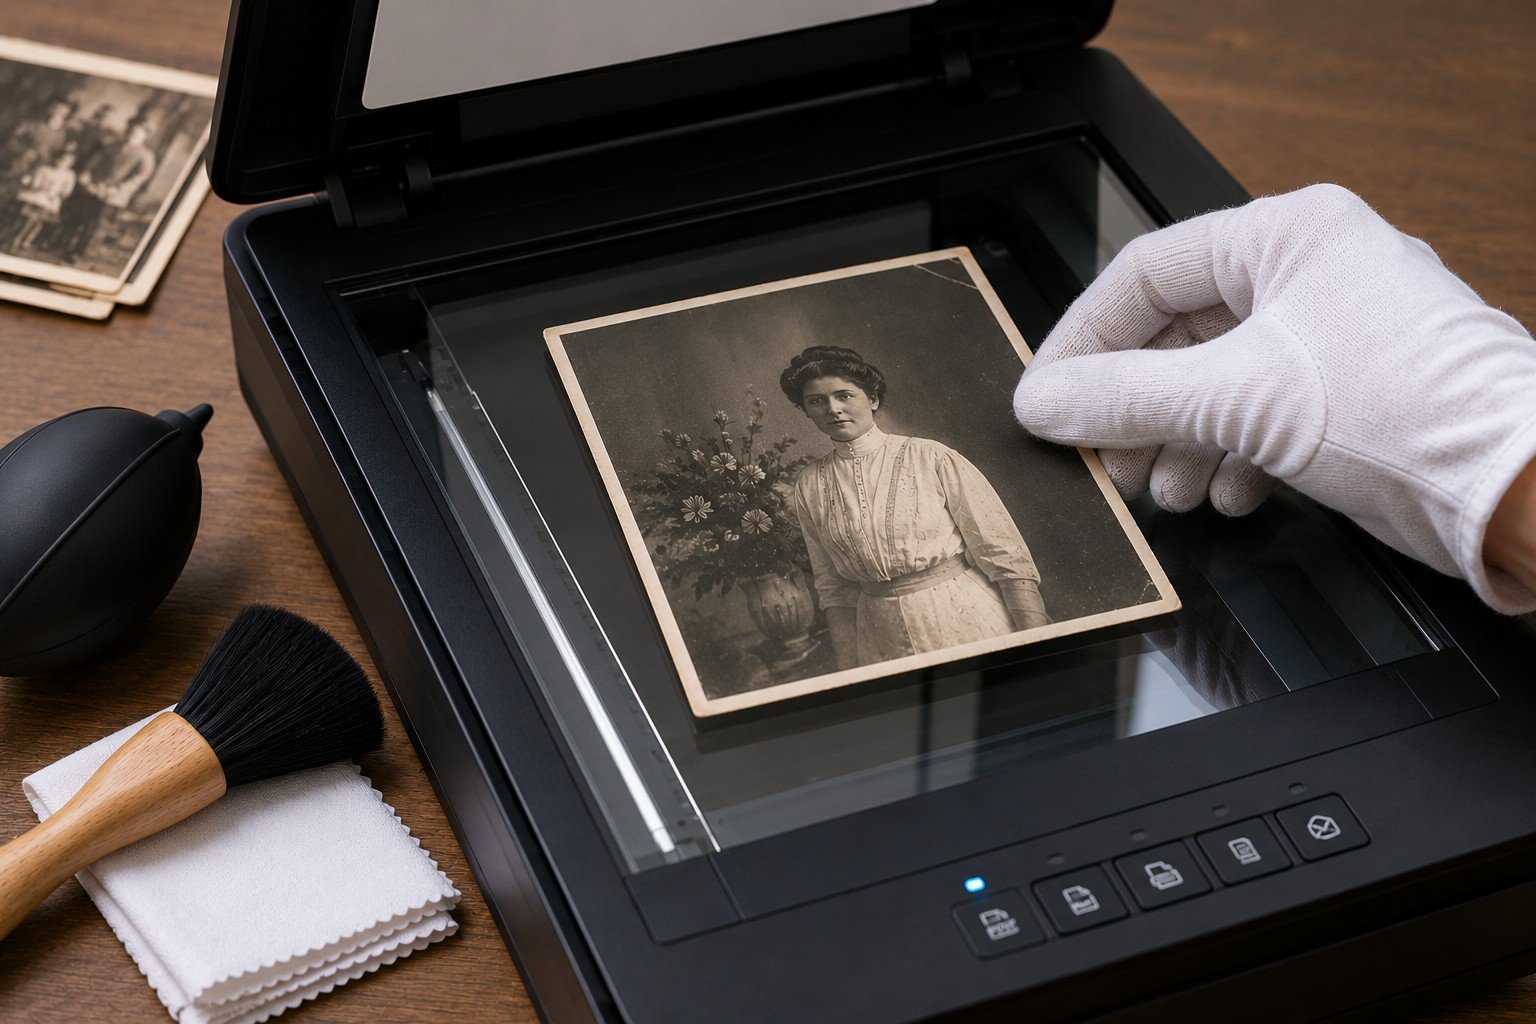
1. Best way to scan old photos
A flatbed scanner is usually the safest option for old photographs because the print remains supported while being scanned. Sheet-feed scanners are not recommended for fragile, curled, torn or mounted photographs because they may bend, scratch or catch on damaged edges.
Phone scanning apps can be useful for quick reference copies, but a flatbed scanner is usually better for important family photographs because it gives more even lighting, better alignment and less distortion.
The scanner itself does not have to be expensive. Careful handling, clean glass, sensible settings and checking the finished scan often matter more than the brand of equipment.
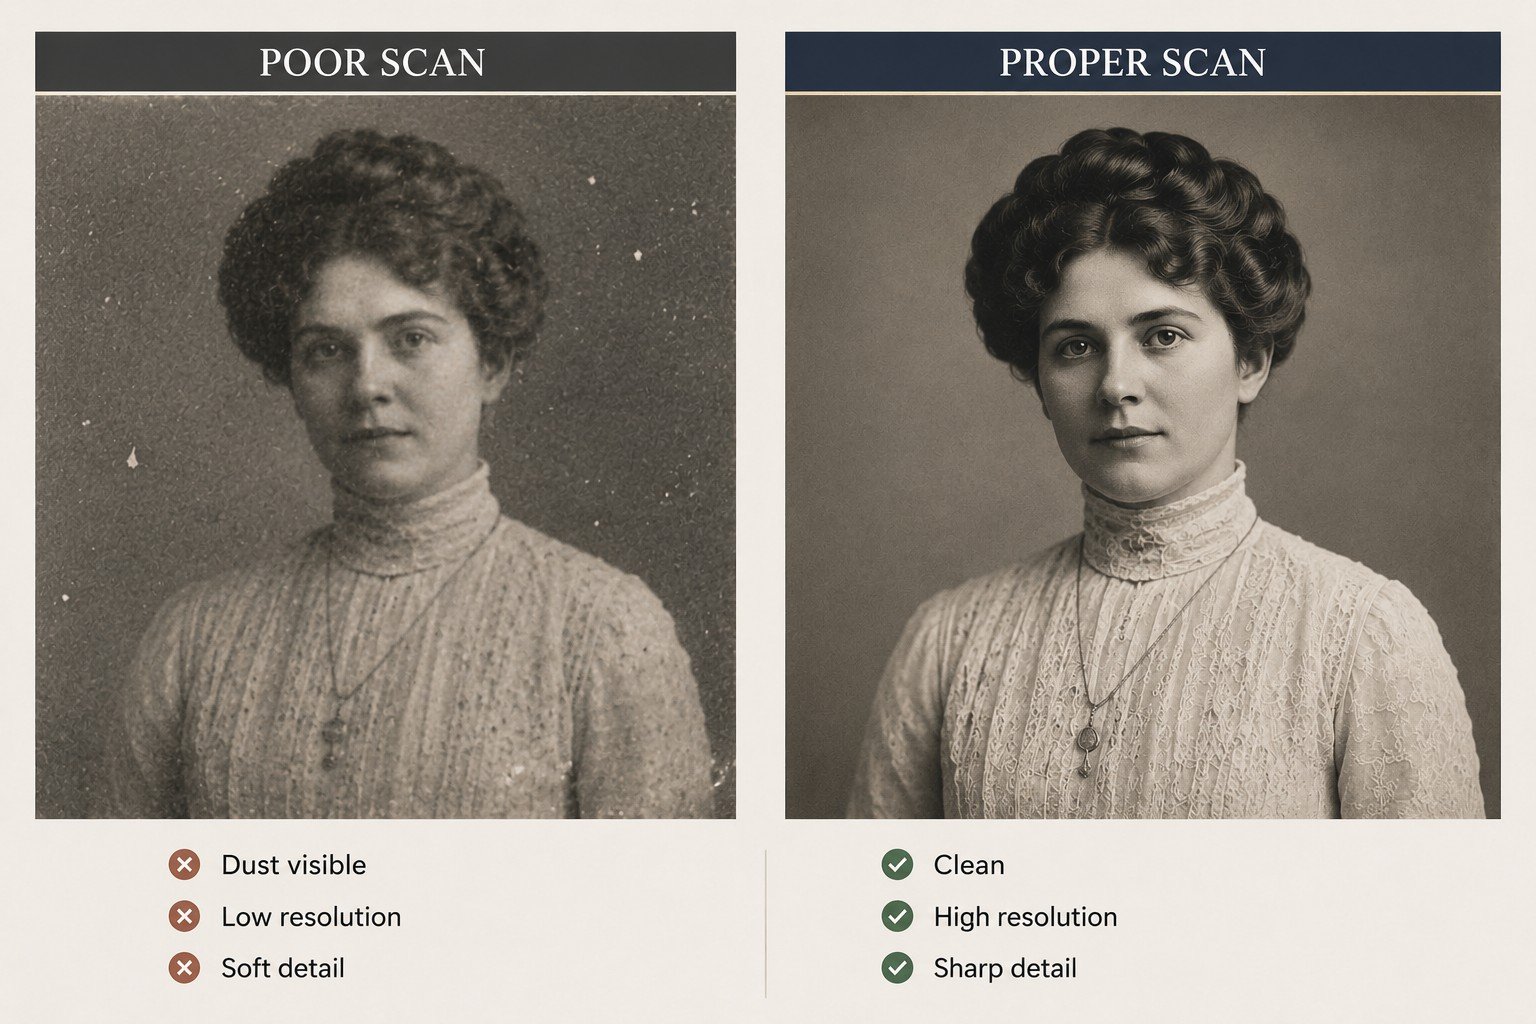
2. Why scan quality matters
Restoration work depends on the information captured in the scan. Fine facial detail, faded tones, paper texture and damaged areas are all easier to repair when the digital file contains enough real information.
A poor scan can limit what is possible. If the image is blurred, too small, over-sharpened or heavily compressed, restoration may involve more guesswork and less faithful repair.
3. Preparing photos before scanning
Before placing an old photograph on a scanner, check whether it needs safe preparation first. Loose surface dust may be dealt with carefully, but old photographs should not be cleaned aggressively or treated like ordinary paper.
Avoid liquids, household cleaning products, wipes and aggressive cleaning methods, particularly where the surface is cracked, flaking, stained or fragile. If the photograph looks unstable, stop and assess it before cleaning or scanning.
4. Resolution and file quality
For many old family photographs, 600 dpi is a sensible starting point. A 300 dpi scan may be enough for simple sharing, while a higher resolution can help with small prints, faces, damaged details or photographs that may later need restoration.
Keep one high-quality master file before making smaller copies for email, social media or everyday viewing. JPEG files are useful for sharing, but they should not be the only version kept if the photograph is important.
The aim is not to create the largest file possible. The aim is to capture enough real detail so that the photograph can be preserved, restored or reprinted later without needing to handle the original repeatedly.
5. Common scanning mistakes
The most common scanning problem is assuming that any digital copy is good enough. A poor scan may look acceptable at first glance but fail when enlarged, restored or printed.
- Scanning at low quality and losing fine detail.
- Using automatic enhancement tools that change the original appearance.
- Sending screenshots instead of proper scan files.
- Cropping too tightly around the subject.
- Photographing the print under uneven light instead of scanning it properly.
- Forcing curled, mounted or fragile photographs flat.
- Overwriting the best scan with a smaller edited copy.
6. When not to scan at home
Do not force a photograph onto a scanner if it is curled, cracked, sticky, mouldy, flaking, torn, water-damaged or attached to another surface. Pressing it flat may cause further damage.
Some photographs should be assessed before they are cleaned, scanned or restored. This is especially true where the image is stuck to glass, trapped in an album, badly curled, water-damaged or historically important.
See how to identify damage in old photos before handling fragile photographs further.
If you are unsure whether a photograph can be scanned safely, send a clear phone photo first. A quick assessment can help avoid unnecessary damage to the original.
Ask before scanning a fragile photoPrintable scanning resources
Need a fuller scanning workflow?
This page covers the basic principles. For practical use, a printable guide is better because it gives you a structured way to prepare, scan, check and protect your photographs without missing important steps.
The Past2Perfect digital guides are designed for people who want a more organised step-by-step workflow, including preparation notes, scan-quality checks and handling reminders.
Related Preservation Guides
Continue protecting your photo collection
Scanning is only one stage of preservation. These related guides explain how to prepare photographs safely, identify damage, store originals correctly and understand when restoration may be needed.