Photo preservation guide
How to Clean Old Photos Before Scanning: Safe Basics You Can Do at Home
Old photographs can be delicate, and many people worry about damaging them before scanning. A few simple precautions can help keep your pictures safe without using specialist techniques. These are the basic steps to follow at home before deciding whether deeper cleaning, scanning or restoration is needed.
How should you clean old photos before scanning?
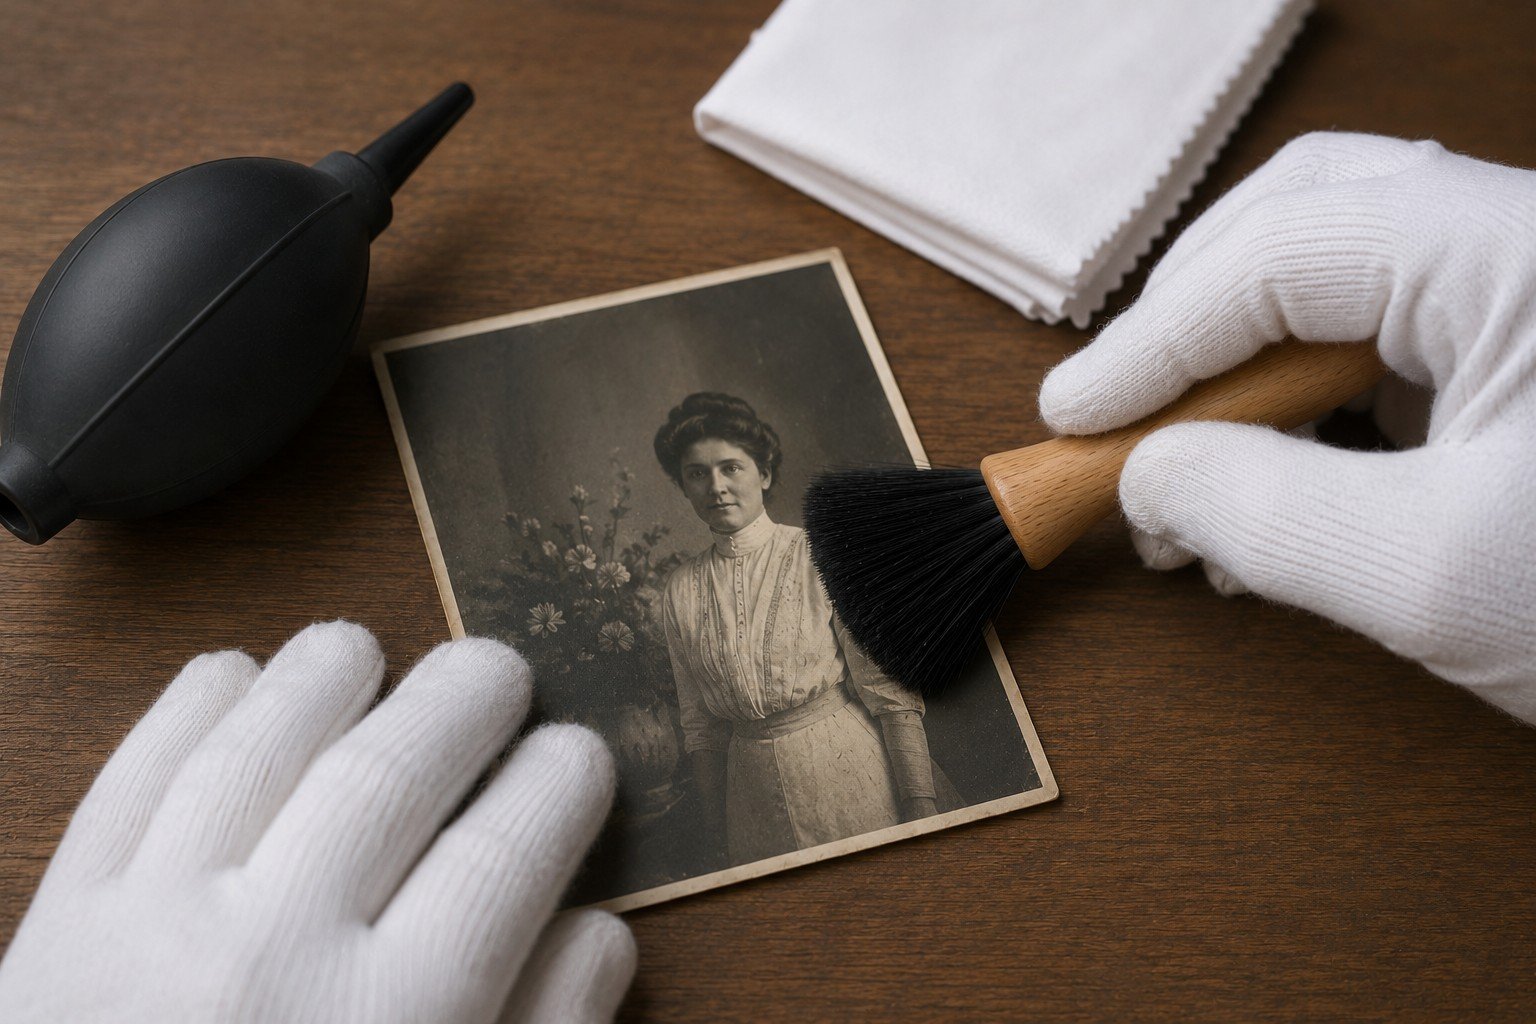
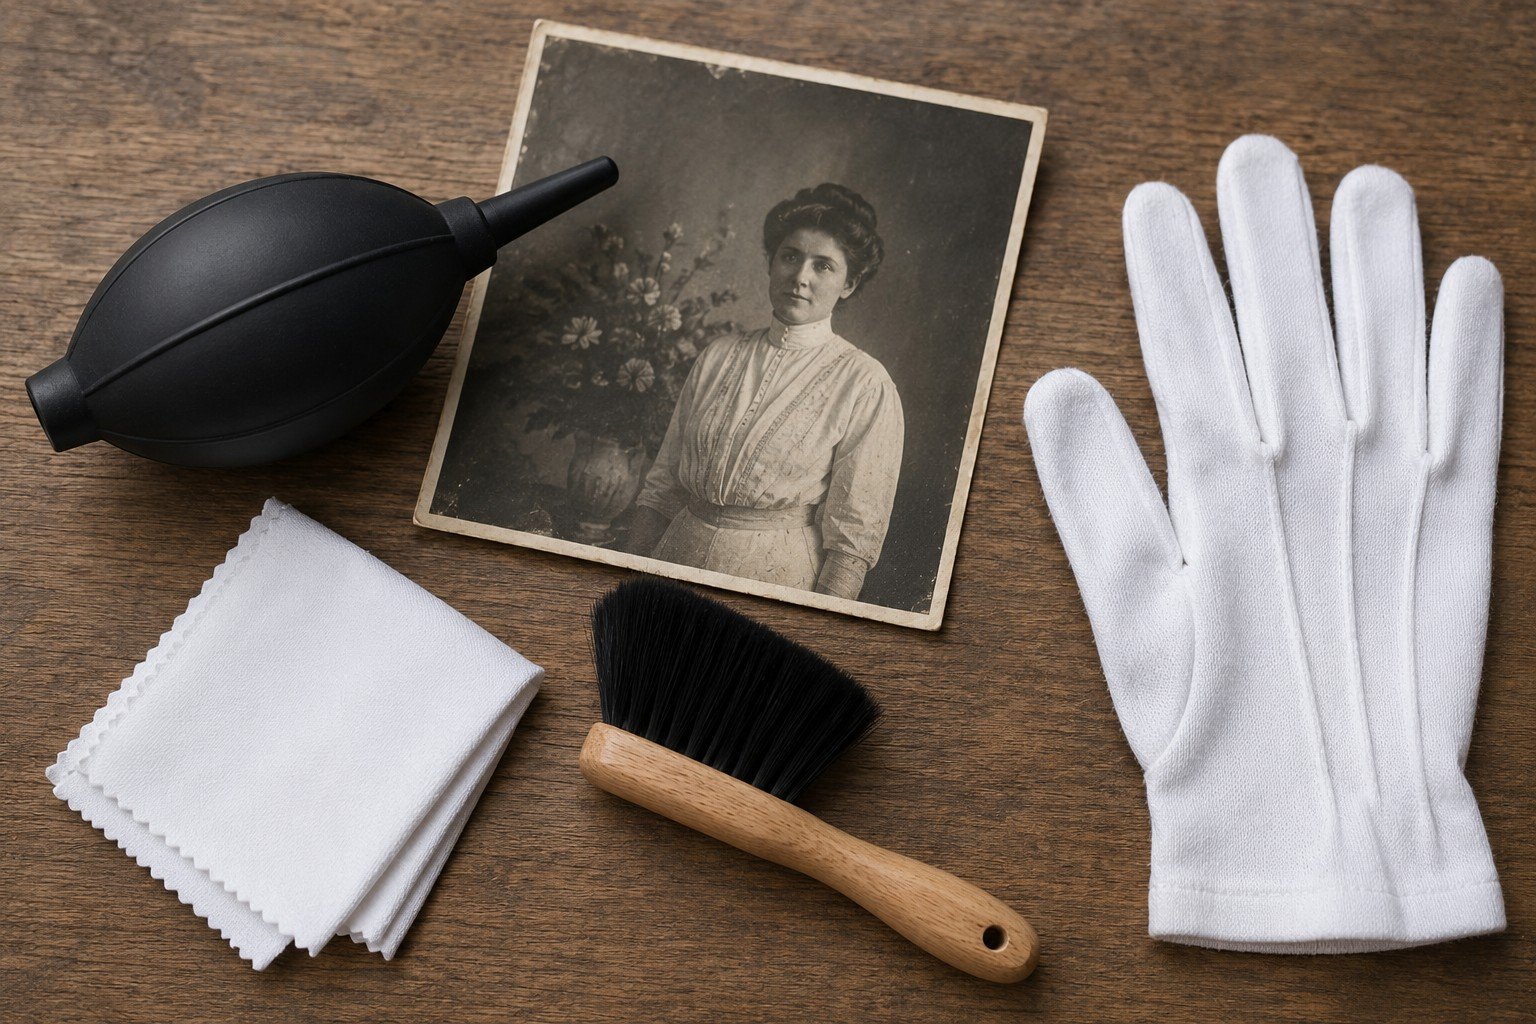
In most cases, old photos should only be dry-cleaned before scanning. Use a soft brush, clean hands or nitrile gloves, and avoid water, sprays, household cleaners or rubbing. If the photograph is flaking, sticky, mouldy, cracked or water-damaged, do not clean it before scanning.
If a photograph is fragile, mouldy, flaking, water-damaged or stuck to glass, do not attempt to clean it before asking for advice.
Why cleaning matters before scanning
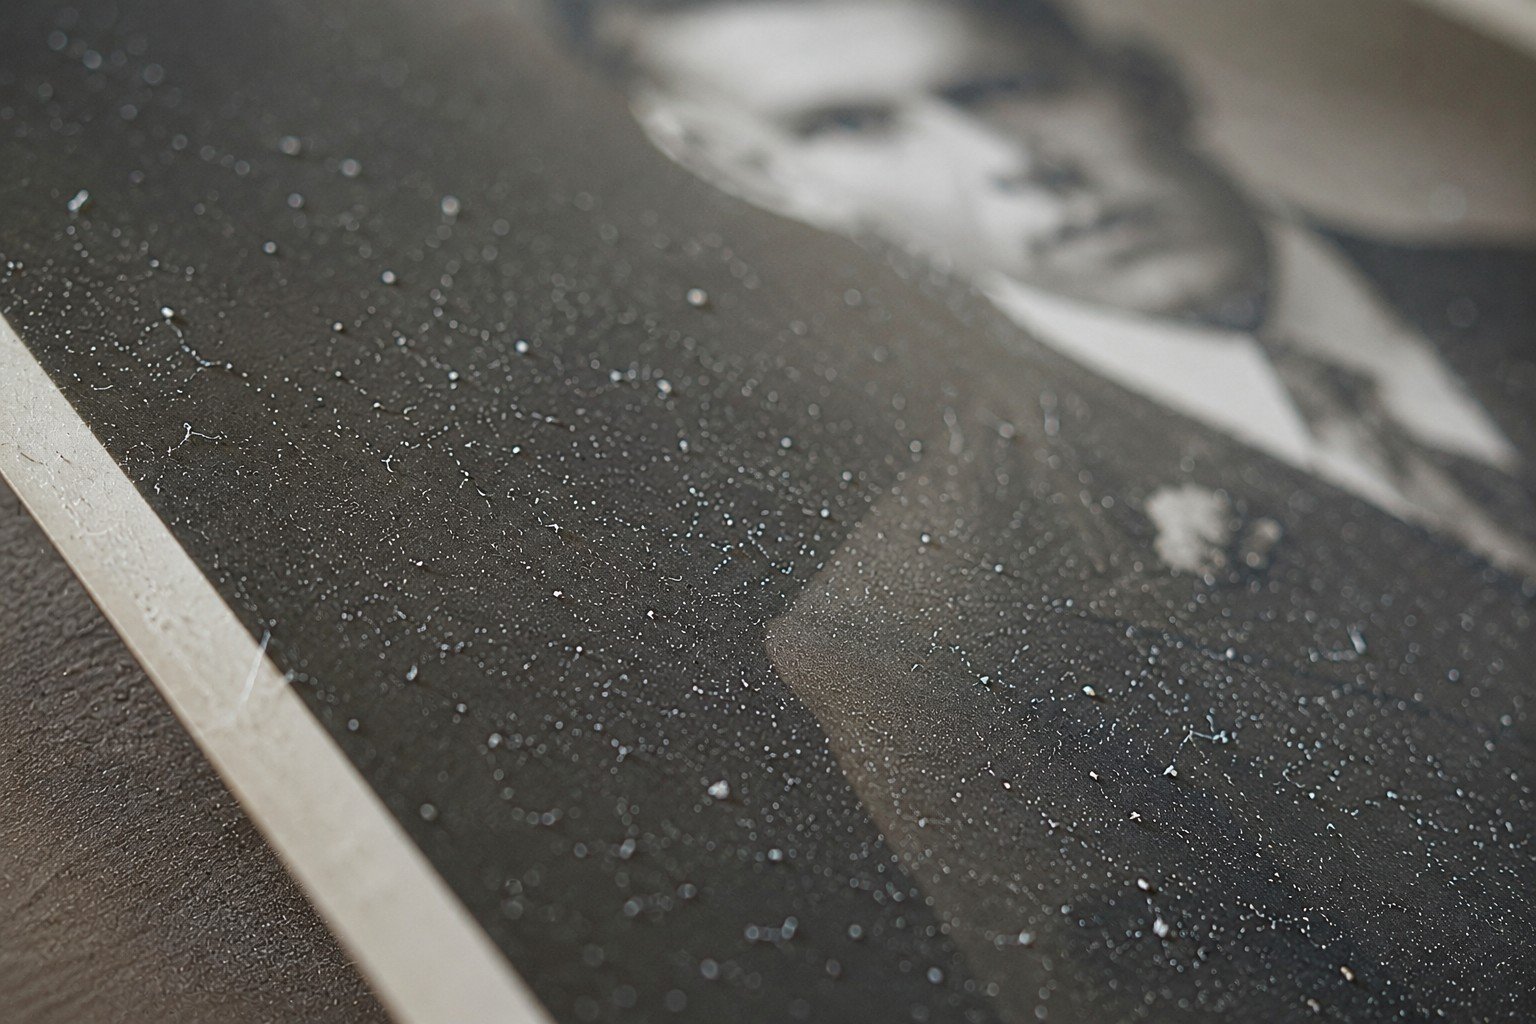
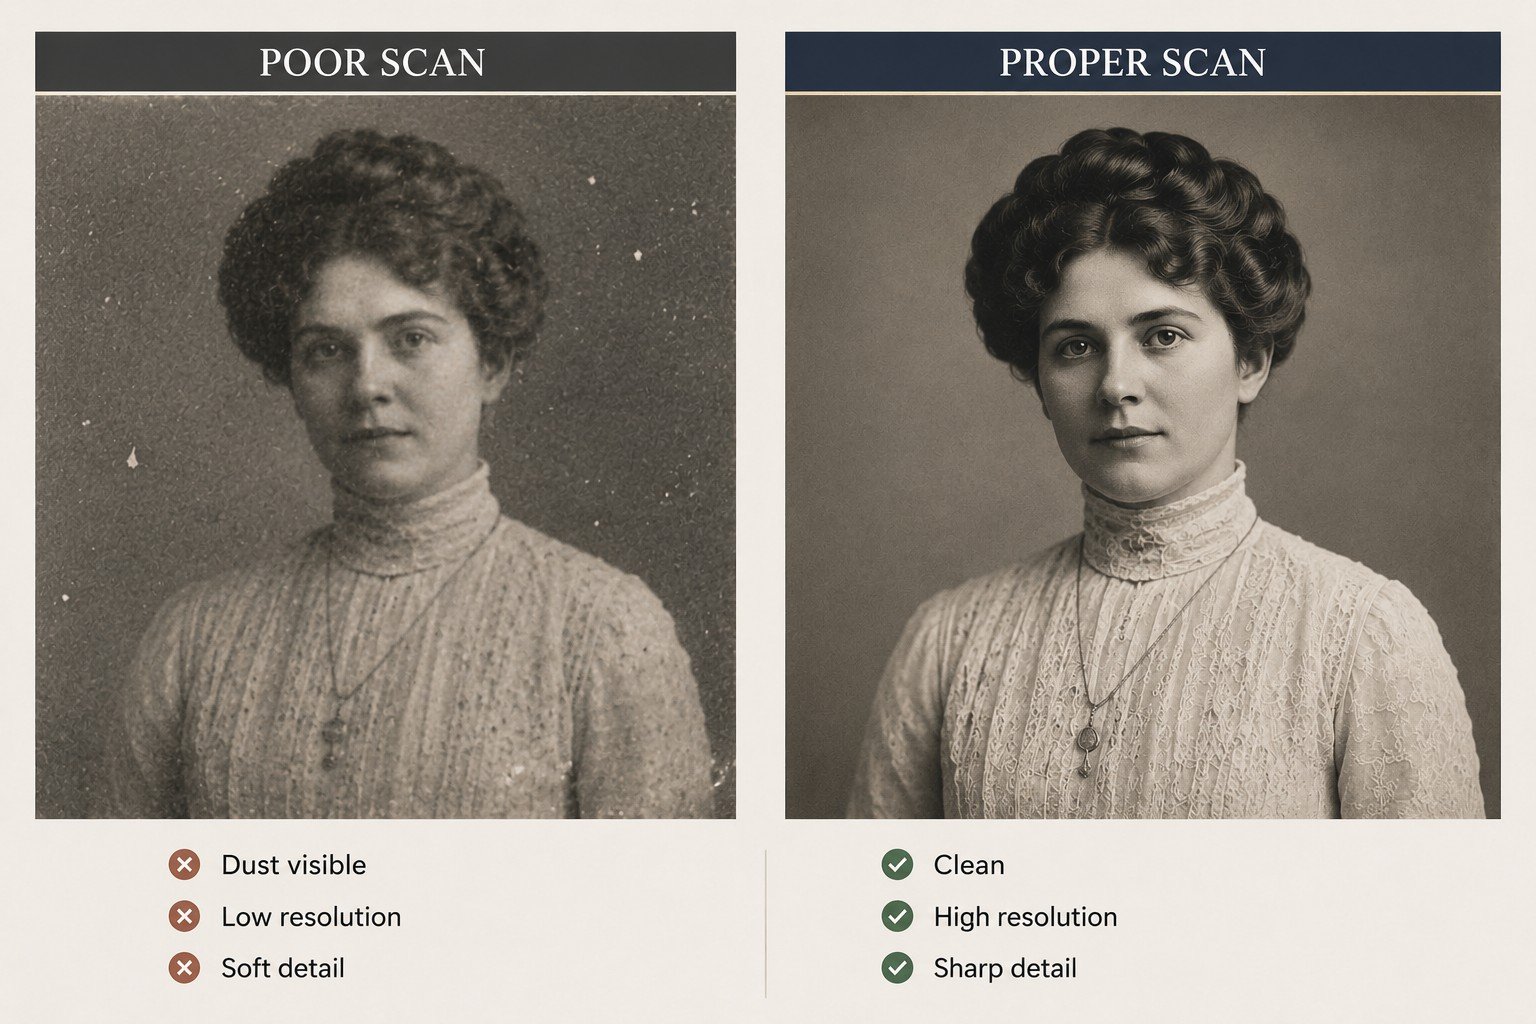
Dust and loose dirt often show up more clearly once an old photo is scanned, creating small marks on faces, clothing and plain backgrounds.
Careful preparation helps create a cleaner scan, but the aim should never be to scrub, polish or repair the original photograph.
Minimal handling is usually safest. A slightly dusty scan is far better than permanent damage caused by over-cleaning.
Check the condition before doing anything
Old photographs can be brittle, curled, cracked, stained, stuck to album pages or affected by moisture. The condition of the photograph should determine whether any cleaning is attempted at all.
If the surface looks unstable, lifting, powdery, sticky, mouldy or softened, cleaning may cause more harm than good.
The first decision is not “how do I clean this?” but “should this be touched at all?”
What safe preparation means
Safe preparation means reducing obvious loose dust while avoiding pressure, moisture and unnecessary handling.
Stable photographs may only need very light preparation before scanning. Fragile photographs may need to be scanned as they are, or assessed before any attempt is made to clean them.
For a comprehensive pre-scan checklist and step-by-step preparation guide, use the Past2Perfect digital downloads available through Etsy.
Avoid permanent damage
What you should never use on old photographs
Most avoidable damage happens when old photographs are treated like ordinary paper. They are not ordinary paper.
Do not use water
Moisture can cause staining, swelling, sticking, surface softening and permanent image loss.
Do not use household cleaners
Glass cleaner, sprays, wipes and cleaning fluids can react badly with photographic surfaces.
Do not use rough cloths
Rough materials can scratch delicate surfaces and leave fibres behind.
Do not force curled photographs flat
Flattening by force can crack, crease or split older prints.
When not to clean the photograph yourself
Some photos should be checked before any cleaning or scanning, especially if they are fragile or unstable. Signs to pause include flaking surfaces, mould, musty odours, prints stuck to glass or album pages, brittle or curled paper, water damage or anything historically important.
If you are unsure, do less. Do not clean, flatten or scan the photograph until you are confident it can be handled safely.
Water Damage Warning
Do not clean water-damaged photographs before assessment
Water-damaged photographs can have softened surfaces, staining, mould risk, stuck layers or weakened paper. Cleaning, wiping or forcing the print flat can cause further image loss.
Cleaning is only one part of scan preparation
A cleaner photograph does not automatically create a better scan. Scanner glass, file quality, handling, crop, sharpness and storage decisions all affect the final result.
This is why a structured pre-scan process is useful. It helps you prepare the photograph, avoid common mistakes and check whether the finished scan is suitable before the original is put away.
Better preparation supports better restoration
Photo restoration depends on the information available in the scan. A clear, stable, well-prepared photograph gives a better starting point than a rushed or poorly handled original.
If the photograph is badly torn, faded, scratched, stained or fragile, it may be safer to ask for an assessment before cleaning or rescanning.
Next step
Ready to scan the photograph?
Once the photograph has been checked and any loose surface dust has been dealt with safely, the next step is to create a careful digital copy. Before placing fragile, curled or damaged photographs on a scanner, follow the scanning guidance below.
Frequently asked questions
Can I wipe old photos with a damp cloth?
No. Moisture can permanently damage photographic surfaces. Avoid damp cloths, wipes and cleaning fluids.
Should I clean a photo that is stuck to glass?
No. Do not pull, soak or scrape it. Ask for advice before attempting removal.
Is dust always a problem?
Not always. Loose dust can affect scan quality, but aggressive cleaning can cause worse damage than the dust itself.
Should I clean every photo before scanning?
No. Some photographs are too fragile or unstable to clean safely. Assess condition first.
Can Past2Perfect advise before I scan?
Yes. A clear phone photograph is often enough for an initial view on whether the item looks safe to scan or needs more care.
Related Preservation Guides
Continue protecting your photo collection
Cleaning is only one part of preservation. These related pages explain scanning, storage and wider photograph care.
Part of the Preservation Guide Series
Need a practical checklist?
For printable preparation checklists, safe handling guidance and scan-quality checks, view the Past2Perfect digital downloads available through Etsy.